

DIY Christmas Cards
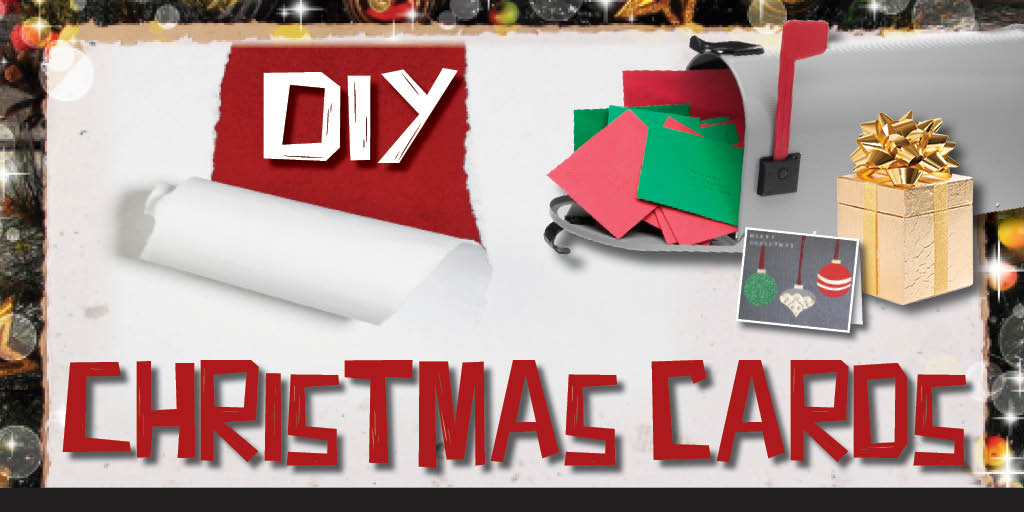
Rather than just buying the generic store-bought Christmas cards this year, why not impress your friends and family and make your own unique cards. They’re fun, cheap and easy to make and look professional once they are done.
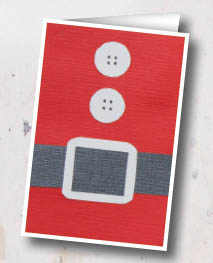
Santa’s Suit Card
What you will need:
• Blank white card 6x4 inch in size
• 8x11 inch red card paper
• 8x11 inch black card paper
• 8x11 inch white card paper
• Ruler
• Black permanent marker
• Glue
Steps
Your card will be made so that the fold is on the left side. Start by measuring out a rectangle on your red piece of card so that there will be a 3/16 inch white border of the card when the red rectangle is placed on it (approximately five and 10/16 inches three and 9/16 inches).
Center and then glue the red rectangle onto the white piece of card.
Measure a piece of the black card so that it is the same length of the span of the red card (3 and 9/16 inches) and make the width three inches.
Place it horizontally three inches from the top of the red piece of card and glue in place. This will be Santa’s belt.
Cut a rectangle piece of white paper that is one and 14/16 inches by one and 10/16 inches. Round the corners with a pair of scissors to look like a buckle of a belt. Stick it in the middle of the black strip of paper.
Measure a one and 6/16 inch by one and 2/16 inch piece of black card paper and stick it in the middle of the white square so that it lines up with the black belt.
Now that the belt is complete, trace a nickel two times on the white piece of card stock. Cut out the circles and draw 4 dots in the shape of a square in the middle of each to look like a button. Line the buttons up above the belt buckle and glue.
Christmas Ornaments Card
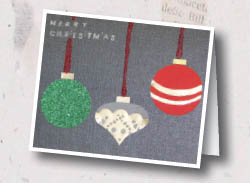
What you will need:
• A blank black card 6x5.25 inches in size
• 8x11 inch red card paper
• Green glitter card paper
• Gold card paper
• Red glitter glue
• Ruler
• Letter stamps
• A silver stamp pad
Steps:
Your card will be made so that the fold is on the top, so when standing it resembles an upside-down “V”. When it comes to making the ornaments, you don’t have to go with the red, green and gold card paper. Feel free to be creative and design your own. Use different sized circle objects as a template for your ornaments. They should be approximately one and 13/16 inches in diameter.
Using the green glitter, red and gold card paper, trace around the circle objects on each piece of paper so that you have three circles.
Cut around the circles and glue the circles in different heights across the black piece of paper.
Measure three 1/2 inch by 3/16 inch rectangles of gold card paper and stick them centered at the top of the circle to complete the ornament.
Using the letter stamps, dab the letters in the silver stamp pad and then onto the black paper in the top left corner and write the greeting of your choice.
Line up a ruler extending from the top of the card to an ornament and draw a line of glitter glue from the top of the card to the gold piece on the top of the ornament. Make sure to not cover up the silver writing.
Gently peel the ruler off and wipe before repeating with the other two ornaments. Allow it to dry.
Christmas Presents Card
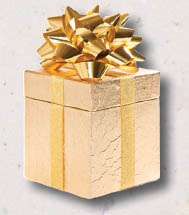
What you will need:
• A blank white card 6x4 inches in size
• Red yarn
• Different types of decorated paper
• Fine tip black marker
• Scissors
• Glue
Steps:
Your card will be made so that the fold is on the top, so when standing it resembles an upside-down “V”.
Cut out four different sized rectangles and squares to place along the bottom of the card with a height no taller than two inches.
Cut a six-inch piece of yarn and tie it around the paper rectangles so that the yarn goes over vertically in the middle of the present and ties at the top.
Cut off any excess yarn. Do the same with the other three presents.
Alternate the ribbon so that some just have yarn horizontally, some only vertically, and some with both.
Glue each present along the bottom of the card so that they are an equal distance apart.
Write the greeting of your choice with the black fine tip marker in the middle of the card, one inch from the top.
Snowy Pine Trees Card
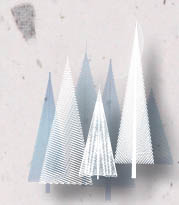
What you will need:
• A blank black card 6x4 inch in size
• A toothbrush
• White acrylic paint
• Three different types of card paper with different designs
• White card paper
• Scissors
• Glue
• A fine tip black marker
Steps:
Dip the toothbrush in the white paint and flick over the black paper.
While the paper is drying, cut one isosceles triangle out of each type of paper so that the smallest side is one inch and the height does not exceed two inches.
Fold the triangles in half so that they are equal on both sides.
Run a line of wet glue down the fold and stick it on the black paper so that the three triangles form a triangle in the middle of the page and the sides of the tree flare forward.
Draw three stars on the white paper, cut them out and glue them on top of each tree.
Using a black fine tip marker, write the greeting of your choice in the bottom left corner of the card.